Special Chapter 4 : Karaoke Discs
Yes, I am sure most of us, don't do a lot of karaoke however, extraction of music and videos from such discs are often used in other applications like music videos or background non-vocal music.
Karaoke discs come in many various formats but I will cover the most common ones.
| VCD |
Video
|
Audio
|
| Since there is no separatable descriptor for the video, the subtitles for the karaoke must be embedded right into the video. So if you are looking to find some music videos, then you will probably have to find another source, or crop the titles off.
The video is standardized MPEG 1, so your MPEGEncoder or TMPG read it no problem. You can refer to Chapter 4: MPEG Encoder |
There is also only one audio track on VCDs so most of the karaoke discs will have the vocal singing track on one channel (eg. right) and the vocalless karaoke track on the other channel (left).
The audio is standardized MPEG 1, so you use Virtualdub to save the audio as a WAV. Refer to Chapter 6: Ripping Audio With Virtualdub. |
|
| DVD | ||
| Type 1
(subbed with LR audio) |
The easiest and laziest way to do a DVD of karaoke is to just rip the VCD version and burn it on to a DVD. Some of the really bad Chinese knock off karaokes are like this. The video would be same as above in the VCD section.
The video can be ripped using DVD2AVI. Refer to Part B, below. |
Again, being the easiest of all the formats, both vocal and non-vocal tracks are all on one audio track so this makes life very simple. Sometimes there is only one stereo karaoke audio track, which is fine, the extraction method is still the same.
The one and only audio track can be extracted using DVD2AVI. Refer to Part B and Part C below. |
| Type 2
(subbed with 2 audio tracks) |
The video is same as Type 1. The karaoke words are burned right into the video.
You can use DVD2AVI to extract the video. The video can be ripped using DVD2AVI. Refer to Part B, below. |
Using the power of the DVD second audio language feature, many discs come with the stereo karaoke and stereo words one two different audio tracks. This way you can jump back and forth by using the change language option on the DVD player.
This is harder since the extraction requires you to specify which audio track you want to rip. You can still use DVD2AVI, but you will need to choose which audio (or rip them all). See the notes in Part C below. |
| Type 3
(subtitle track, with 2 audio tracks) |
This is the best usage of the DVD features. A clean music video which is great for making AMVs yet have the option of turning on/off the karaoke lyrics as one of the subtitles on the DVD player.
The raw video is extracted using DVD2AVI. Refer to Part B, below. The subtitles will need to be extracted using VobSub. Refer to Chapter S01 - Ripping Subtitles here. |
Audio is same as Type 2 above.
Again, you will need to figure out which audio track you want to extract. You can still use DVD2AVI. See the notes in Part C below. |
| Type 4
non-standard VOB/IFO |
I have run across the odd disk that has a DVD menu like Type 3, but when I go to get the audio or the subtitles, they come up blank. |
A. Ripping The Chapters Off The DVD
First, you will want to use Smartripper to rip the DVD and separate it into chapters. Why? Because unlike a movie you watch from beginning to end for 2 hours, a karaoke disc will have 10 to 20+ songs on it each stored on the DVD as a chapter. This way, if you only want to sing the fifth song on the DVD, it can jump ahead and straight to track 5 for you.
I am sure there are many other programs like DVD Decyrptor which can do the same thing, but I will use Smartripper since I find it a bit more easier to set up for chapter ripping.
B. Extracting the Video off the DVD
Now we have individual .vob files for every chapter or every song off the DVD. Now there are some programs like IMTOO DVD to AVI and various other kinds that are more made for ripping movies. However, once you got it as a separate .vob and no linking .ifo file, the number of programs becomes a little more smaller. The one I will use is DVD2AVI.
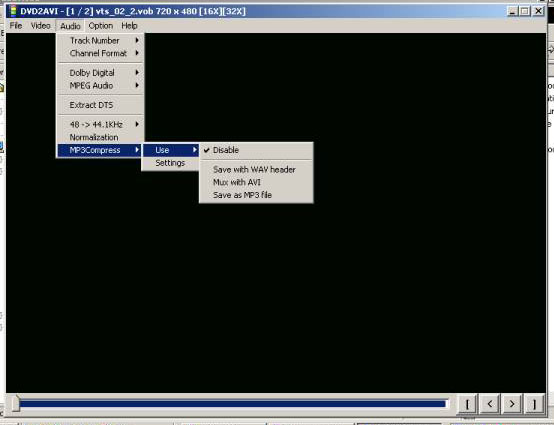
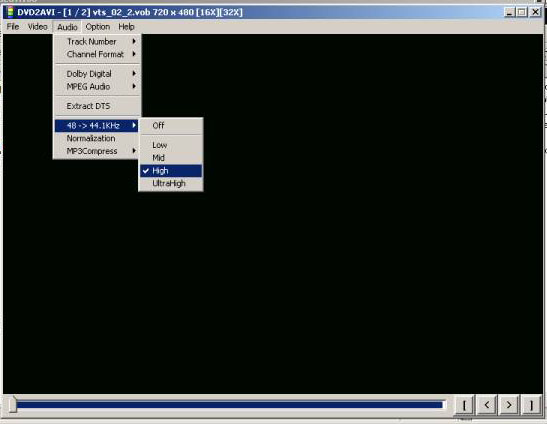
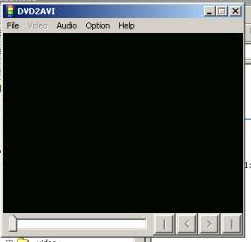
First we launch DVD2AVI, I am using version 186 for this example.
Now, we will click on "File" to select the .vob file we want to convert to .avi. In my case, I have loaded vts_02_2.vob.