Special CHAPTER 3 :
Ripping Non-UDF 1.0 Compliant DVD-RWs (-VR formats)
Written by the King Of Smut Ô95
A. Background
Ok, a bit of history before I begin. As journaled in my web page (www.anikionline.com), I went to China, and got married. My wife's friend has an expensive piece of SHIT called the SONY (another name for shit) DCR-DVD101E digital DVD handycam which he used at our wedding dinner. It records on to blank DVD-Rws Now you can read here, about the absolute fun we had with trying to copy a DVD-RW, and fuitless task of finding tech support in China. Anyway, I did manage to get a copy of my valuable dinner footage on a cheap DVD-R (what else do you expect from China).
So I get it back home to Canada, and guess what? Nothing reads the disk! I tried the Panasonic E-20 standalone recorder, I get a U11 error. Tired Windows XP and 2000, nope, doesn't even recognized it as a disk. Tried a real cheap Daytek DVD player, a menu came up but no files to play. Tried it in the Panasonic S35 DVD player, it played but it was in black and white and it was scrolling! WHAT a load of CRAP!
Ok, time to do some heavy duty internet research. Well, first thing you will read about the Sony DVD101E is that it is CRAP. Many MANY many dissatisfied customers with this model and other similar Sony crap. However by looking at the specs for the camera, it does have a crappy resolution still camera and stupid Pixella Image Maker software which you can't download for free; not even an older decapitated version nor even a drivers disk for the camera for the USB hook up. What a load of bullshit tech support. SONY short for SUCK! But seriously, I did find one piece of important information and that was it was a PAL (not NTSC) recorder. Ok, so that explains why my picture was black and white and was scrolling. This can be easily fixed with Main Concepts MPEG Encoder once I can get the files off the disk.
Now this leads me to the question, how in the heck am I going to get the files off this disk? A computer DVD rom drive doesn't even recognize the disk. Yet, my cheap DVD player did see a file/directory structure. My Panasonic did play it so there is some kinda VOB like thing down there.
I tried using the logical DVD Decryptor to rip the DVD but I get a "can't parse the UDF" error.
Ok, so at this point I was pretty convinced that SONY really was their way of saying "SUCKER" for buying their "SHIT". It is not like they did any better with their Playstation or Playstation 2's with all the defective cheap ass CD/DVD rom drives. But it was clear it was a disk formatting issue. I read kept plugging away at the internet to find some kinda driver for windows to read this stupid Sony format.
I finally came across Wikipedia and their definition of the UDF (Universal Disk Format).
It basically says that Windows XP is SUPPOSE to support up to version 1.5.
However, these types of DVD-RW disks that are being used for VR recording modes are formatted a little differently so thus Windows no longer reads them. Ah ha!! Well, it gets me a little closer. It is obvious, I need a software to read these higher UDF type of disks. What better program than a burning software? And what do you know, a lot of web sites seem to point at things like Nero, Alcohol, and Roxio and etc about being ISO and UDF this and that. However, the thing that stuck out the most that gave me the most confidence was a program called IsoBuster. It apparently can parse and read file structures of many different types of disk formats (UDFs). So lets give it a try.
Phase 1 : Extracting ISO Image Using DVD-Decryptor
Ok, as shown in my FAQ for ripping DVDs, you normally will rip the files off the DVD, using the file mode. But in this case the disk format is not readable so we will need to use ISO (whole disk) format.
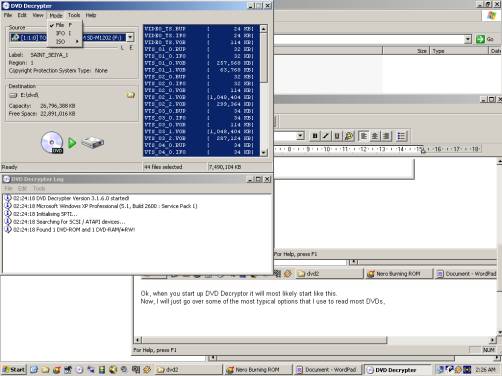
Look at the top bar, there is the word MODE. If you click this Under Mode there is a option listed as FILE. In this case, you will want to do ISO one. There is a right tab on that option, please select the READ option.
You now stick in the DVD you want to Rip and click on the DVD to Hard drive picture.
Ok, let it do it's thing.
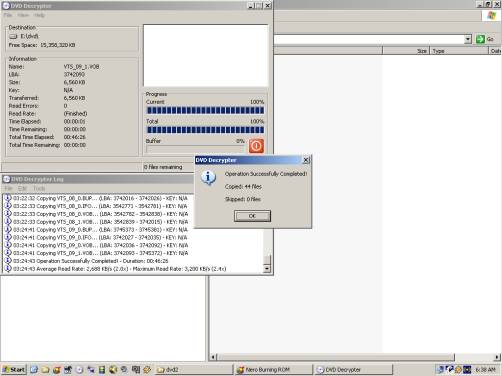
a) And then you are done. At this juncture you will have a file on your hard drive which is a xxxx.ISO.
b) You might also have a companion file xxxx.MDS but you can ignore that for this exercise.
Phase 2 : Extracting Files Using IsoBuster
We now have a back up of our stupid Sony files on the computer hard drive as a .ISO file. For this excerise lets call it the sony.ISO.
We know it does have a directory/file structure that regular DVD players and read and some can play but regular windows can't read it. So, we use a program that has the ability to read many disk formats and read this disk, and then allow us to copy the files off that disk to our normal part of the hard drive so we can edit it at our free will. This program (although I am sure there are many out there) is IsoBuster.
Quite simple program to use. Just start it up.
Go to the menu bar and drag FILE down. Select OPEN, and browse for your sony.ISO file.
It will load it in, and decode it and TAHDAH!!
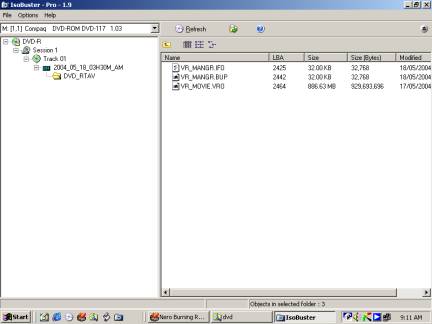
We discover that the disk as a folder called DVD_RTAV. And in this directory we have our .IFO file, .BUP file and a VRO file.
Well, that explains why the Panasonic could read it because the S35 can play disks from the Panasonic E20 Recorder which also can record DVD-RAMs and DVD-Rs. Yet, the Daytek can't because it was looking for VOB files, where there is none.
So, lets drag this folder from the ISO disk, and drop it somewhere on our hard drive so we can access it normally.
Click on the DVD_RTAV folder on the left hand frame.
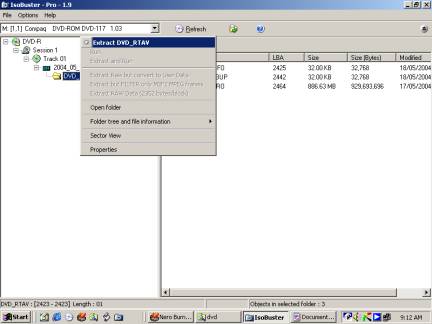
Select the Extract function. It will ask you where you want it saved, and then that is it. Let it do it's job, and then you are done.
Phase 3 : Extracting Audio Using DVD2AVI
Alright, so we have this VRO file on your hard drive and Windows can now read it. But now the issue is, so Windows reads it, so what? It is a file type that almost nothing plays or nothing can edit. You can change the file name from sony.VRO to sony.mpg and it will play in Windows Media player... kinda...
And MPEGEncoder can't find any audio, and virtualdub can't find any video. GREAT...
Ok, one problem at a time. Lets extract the audio out of this file and make it a standardized PCM Windows wave file. Because once we have this we go anywhere with it (at least audioly speaking).
We will use a program called DVD2AVI to extract the audio from the VRO file. It is usually used on DVD's VOB files but it works equally well on VOR files too.
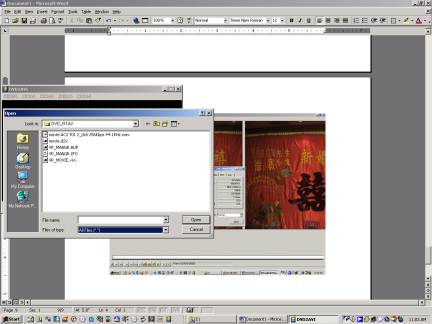
You will start it up. Select from the toolbar FILE then OPEN. A dialogue box will appear. At first there will be no files because it is set to display only the *.VOB files. Go to the "Files of Type:" and change that to "All Files" as shown above. Then all the files will appear in your window.
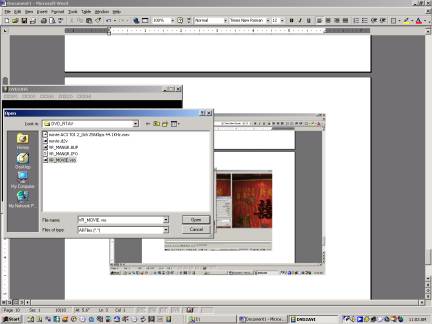
You will select the *.VRO file as shown above and click on OPEN.
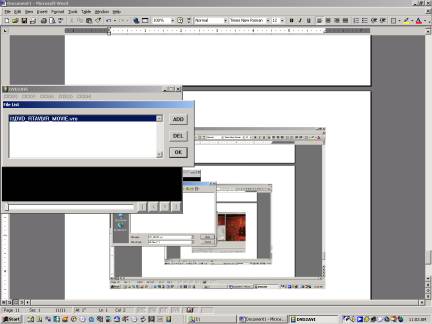
It will just reconfirm the file name and make sure you don't want to add anymore chapters. Just press OK.
Ok, now you will want to save out the Audio WAV. So select from the top tool bar, FILE, then SAVE WAV.
A dialogue box as shown above will ask where you want it saved. Type in your desired filename and click on SAVE.
There you go, it will start churning through the file. You will have a normal WAV file with all the audio it. Now you are thinking what about the video?? Ok, next phase....
Phase 4 : Extracting Video Using VirtualdubMOD
So, what about the video? I have already tried MPEGEncoder and it doesn't recognize the video. I tried regular Virtualdub but it can't detect the video stream. So, I tried the more deluxe version VirtualdubMOD. We start it up.
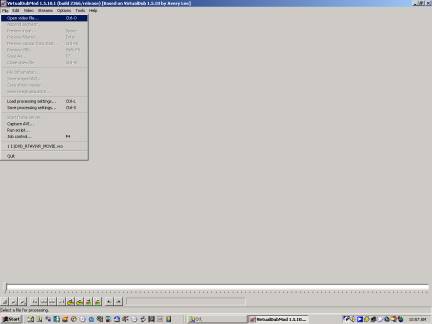
Select FILE then OPEN VIDEO FILE as pictured above.
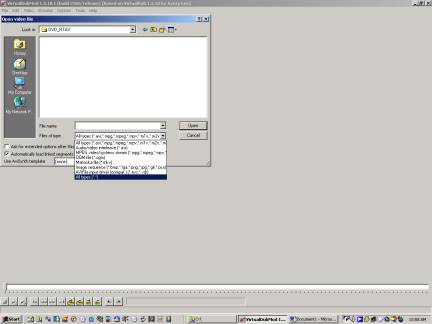
A dialogue box opens up. Again, VirtualdubMOD is looking for known and common video formats so the file menu is empty. You will need to go to "File of Type:" and change it to "ALL Files", as highlighted above. Then all the files show up.
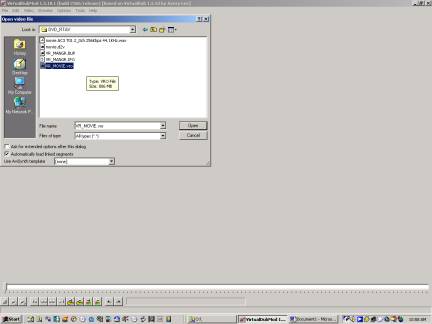
Now you will want to select your VRO file as shown above and click on OPEN.
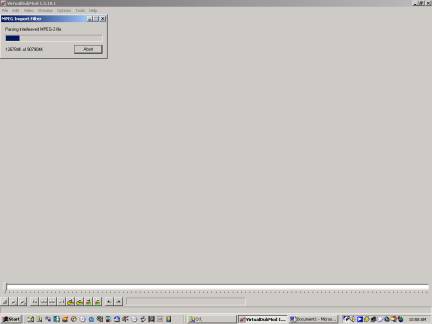
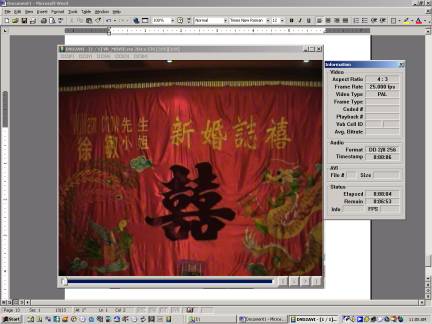
The program will process and parse the MPEG video out of the DVD's VRO file. The opening screen will show up when it is done.

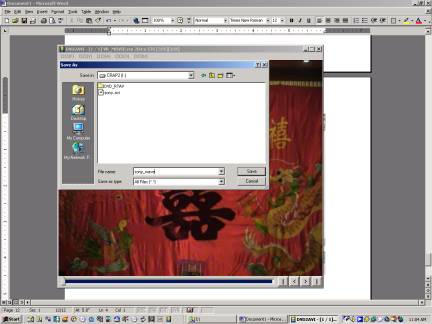
We will now save the working video file to the hard drive. We will select FILE, then pull down to SAVE AS as shown above.
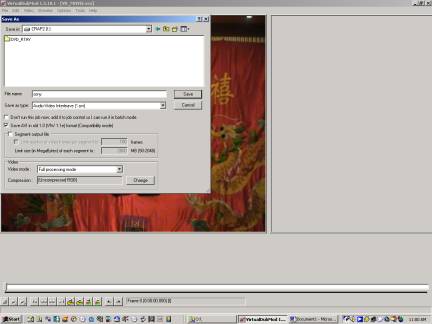
Type in the name that you want to save your finished AVI file, in the above example, I used SONY.AVI. You also want to select AVI 1.0 compatibility so that MPEGEncoder is assured to read it. You will also need to click on the CHANGE button to change the compression type, otherwise it will eat up lots of hard drive space! If you plan to make a DVD out of it and you do want to retain as much quality as possible, then leave that alone. Just remember you will need lots of hard drive space for the rendering.
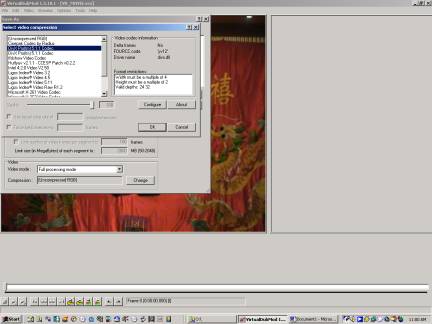
I have picked DIVX for this example. Press OK.

Let it do its thing. Once it is done, you will have an AVI file with your video and if you are lucky the audio too.
Phase 5 : ReEncode The For DVD Format
What? You are thinking, I should be done by now. Yes, I would be but there is one more problem. That stupid piece of shit, we call Sony, recorded my wedding movie in PAL not NTSC. So I will need to re-encode the video again so I can make a DVD that will play in DVD player that isn't black and white and that doesn't scroll on my TV.
Also for those people who the video and audio are out of sync or the video is still not compatible with your movie editing software, then this step might fix that.
For this job, I shall use Main Concepts MPEGEncoder. You could also used a whole host of other programs like TMPGENC or WinAVI or blah blah blahÉ
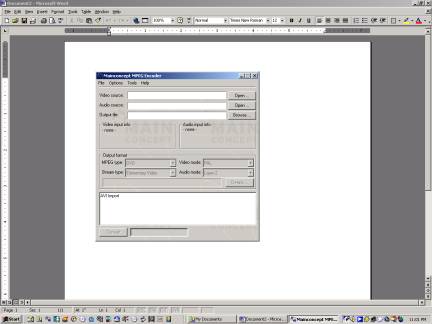
Ok, you get this screen once you start it up. You will want to click on the OPEN button next to the VIDEO SOURCE line.
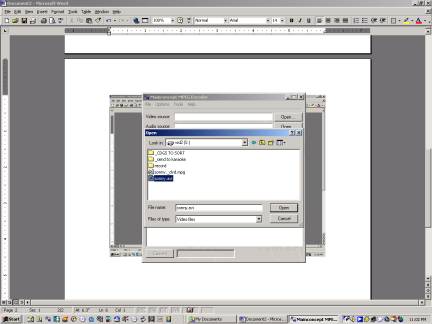
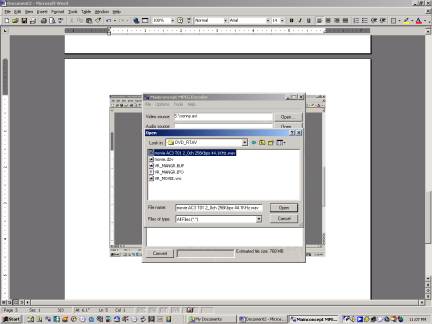
You will get a dialogue box asking you where is the video file you want to fix is. In this case, it will be the SONY.AVI file that we made back in Phase 4 with VirtualdubMOD.
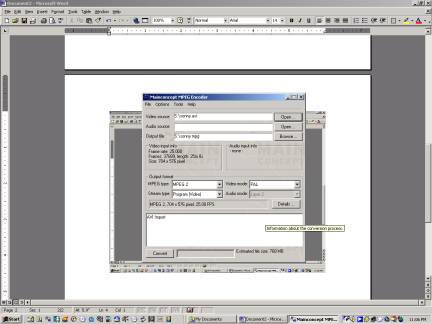
Now it loads the file up and we can now see some problems. First of all, MPEGEnc did not recognize any audio in the AVI. Probably because the audio is at 48.0 Khz instead of the usual 44.1 Khz. We can also see that the Video is encoded in PAL, and I want NTSC.
First things first: To load in the audio that we made from Phase 3 using that DVD2AVI program, we will click on the OPEN button next to the AUDIO SOURCE space.
We will get this browser window. I will select that WAV file that was made by DVD2AVI back in phase 3. Remember, you will need to change the "Type Of File" box at the bottom to "All Files" to be able to see the *.WAV files.
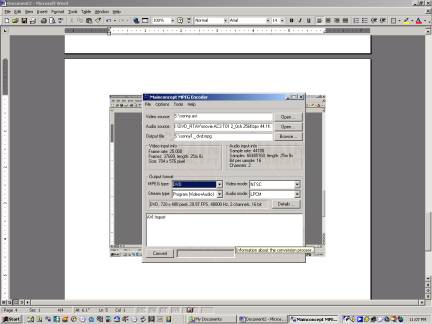
So, we got the audio now. We click and change the PAL to NSTC. We change the MPEG2 option to DVD so I can burn a DVD with the file.
I click on the CONVERT button once everything is set. Then let it do its job. The resulting file will be something that is going to compliant with DVD authoring software like TMPGENC DVD Author. This process will also allow you to make movie editor compliant video by having it encode to MPEG2 or MPEG1.
Well, the lesson behind all this hassle. AVOID SONY products like the plague! Use it if you have to but be prepared to do the work.