
Chapter 6 : Virtual Dub MOD
Part 3 : Recombining Video/Audio/Subtitles
A common thing to do is take something that has subtitles like a .mkv file or take a foreign movie that has a separate .sub file and mash it all together to make one playable file with the subtitles burned on the screen.
First reason I do this is that most of the time, the computer I go to play the video on doesn't have the stupid codec in it. Actually most of the time it doesn't. Which precludes reason number 2, when I go to lend the video out, the person who I give it to can't play the file either. Then I am caught wasting time troubleshooting a problem which I should have fixed in the first place. Reason number 3, one of the people who I get a lot of Chinese movies for is my 70 year old mom. Now, have you ever tried to explain how to turn on or off a subtitle on a DVD to your parents? Have you noticed they will watch a movie with both Manderin and Cantonese going at the same time because they can't turn one channel of the audio off? So, in order to stave off the headache, I will convert the video and audio and subtitles to a single file which can be burned on to a DVD or VCD which plays automatically with no menu configuration.
The tool is the very powerful Virtualdub MOD. This program I covered a little bit in an earlier module. This version is a MODified version of the original and has several more features installed into it including support of multi-track audio.
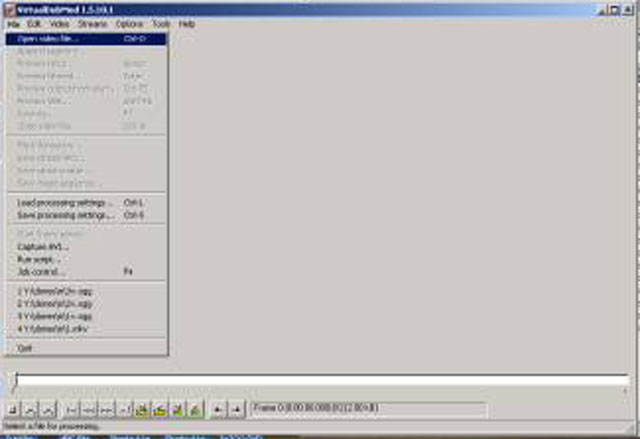
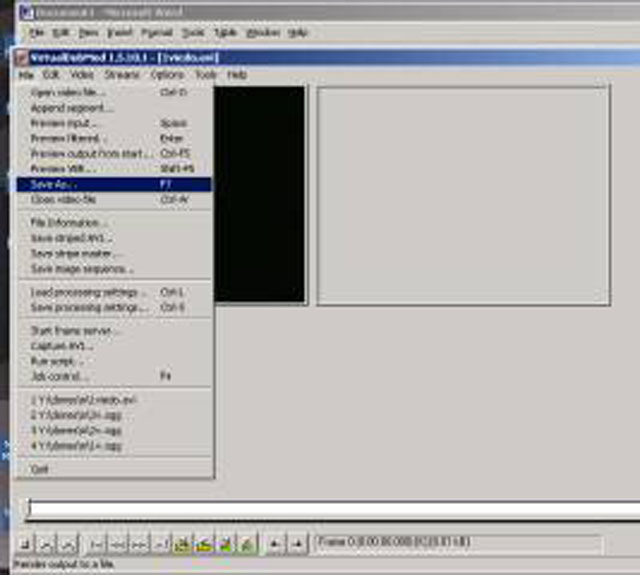
You start it up and you get a screen as follows:
We will now, need to specify where our movie file is. A lot of the time it will be an .AVI file but sometimes you can use .mpg and .mkv and .ogg files too. Click the FILE word at the top left on the command bar, and select OPEN VIDEO FILE.
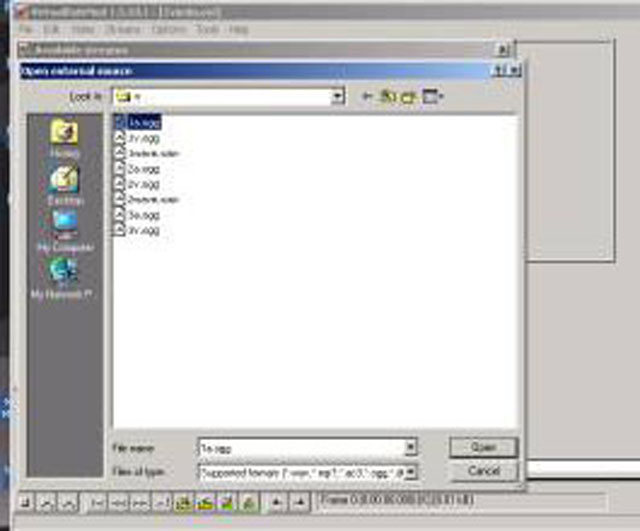
It will open a browser window as follows:

Select your file you want to get the video/audio out of. If the video has audio, then you can skip the next step. This file are usually .AVI but can also be .OGG or .MPG and sometimes even .MKV. The screen will look like this after it loads up.
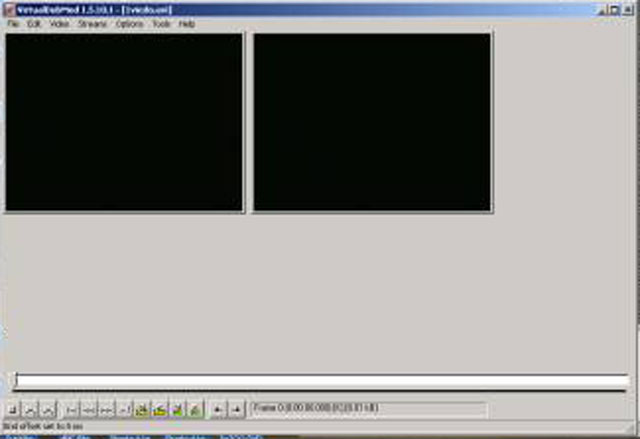
To load the separate audio in, you will choose STREAMS from the top menu. Then you will choose the option STREAM LIST.
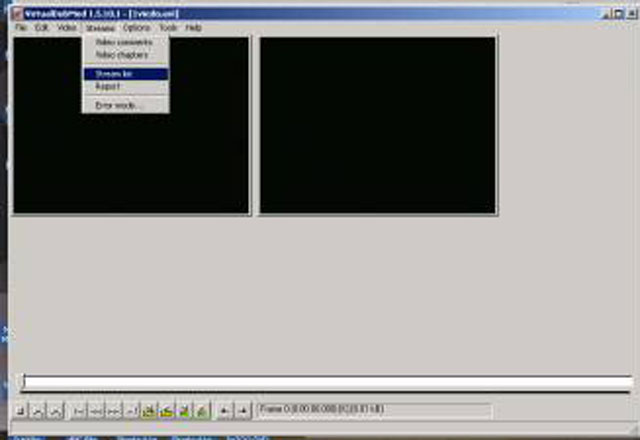
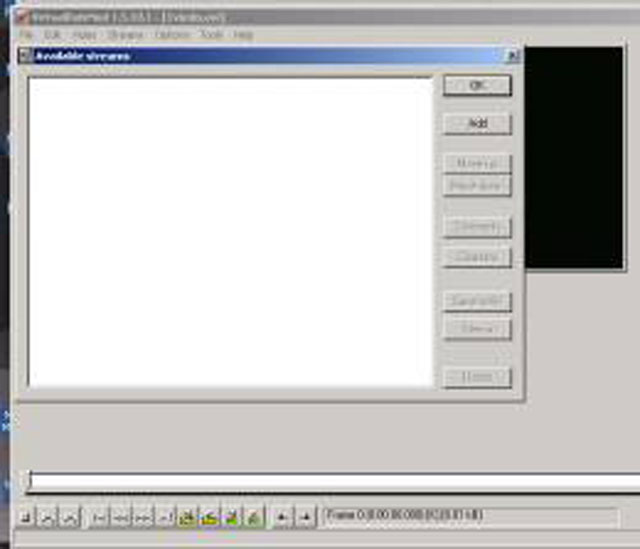
A sub-menu will appear with all the various streams of audio and theoretically anything else will be. In our lesson, we will be adding our own audio, so we will select ADD.
You will select the file that has your audio track in it. It will usually be a .WAV file that you might have used virtualdub to strip out the audio. It can also be a DVD-rip file that DVD2AVI might have produced. But in this example, we chose VirtualdubMOD because it can handle .ogg files.
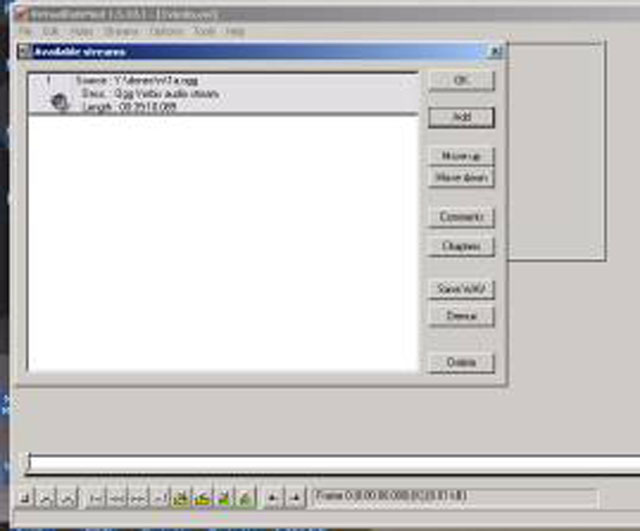
Once it is loaded you can see the stream in the window. You can press OK.
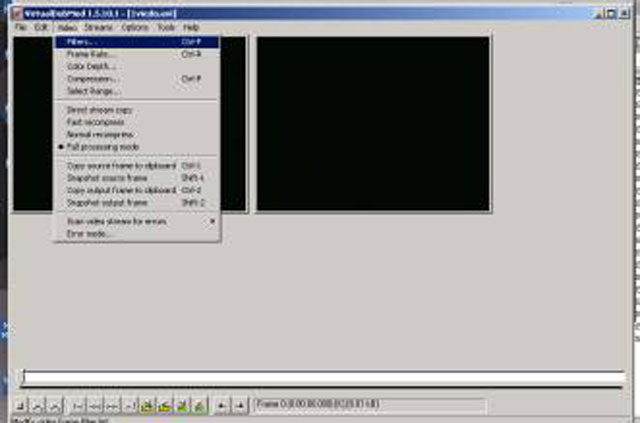
Ok, it will return to the main menu again. You will see 2 frames now with the first frame of your movie file in it as shown in the picture above. The one on the left is the original input video file. The one on the right is the altered one with all the filters applied to it. The purpose of this is a before and after view of the movie. Before is the unaltered video input, and the after is the picture after you applied all the filters which includes the subtitle filter that I am going to explain now.
You need to make sure that FULL PROCESSING MODE is checked. Now, select FILTERS from the top bar like shown in the picture. As you can see, the FULL PROCESSING MODE is on. Now, we add the subtitle filter. Select the first option, FILTERS.
A new sub-menu comes up. You will select ADD.
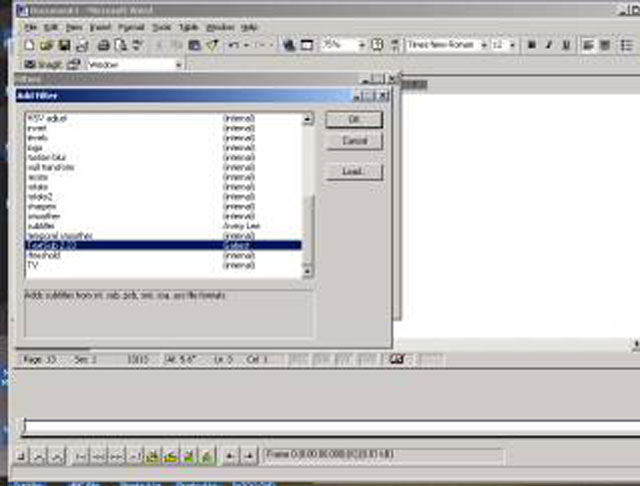
A list of filters will show up. There a lots of things to play around with the video and quality and stuff like that. However, the one we want is TextSub. So scroll down to that one and click on it. Then you will select the file which contains the subtitle text. The textfile must be in Substation Alpha format (.SSA).
Now we go to save our final product. We will select FILE, then scroll down to the option SAVE AS.
You need to configure how you save the .AVI file.
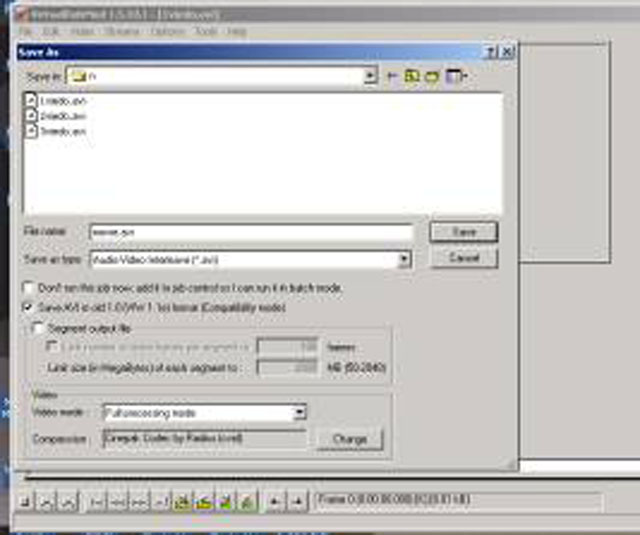
First you will need to specify the filename for the .AVI this program will save everything under. Because of this, ensure the next box "TYPE OF FILE" is set to .AVI. Next, uncheck the "BATCH MODE" box. I like to save it in the old AVI format because almost all avi to mpg converting software is backward compatible but none of them are forward compatiable. So to ensure that it will be readable afterwards, I save it in AVI 1.0 mode, thus put a check in the "SAVE IN OLD AVI 1.0 FORMAT" box.
Also in this menu, you will see at the bottom where it says "FULL PROCESSING MODE". Under this, is the format you would like the AVI file to be compressed with. Most people pick DIVX or XVID. Click on the "SAVE" button and then it will begin to process it. If you are happy with .AVI format you are done. Personally, I like my media files as a VCD or DVD. Thus, I would now take this AVI and shove it through MainConcepts MPEG converter to get it out of AVI format to MPEG compliant video.