CHAPTER 1 : Using DVD Decryptor On DVDs
Written by the King Of Smut ‘95
This is a very powerful program. It’s basic functions can be mostly done using DVD Shrink but since there are certain things that can’t, I will just be all inclusive and say, use DVD Decryptor first and if you need to use DVD Shrink use that second.
In this chapter, I will cover the topic of how to used
Decryptor to rip the files off a DVD movie.
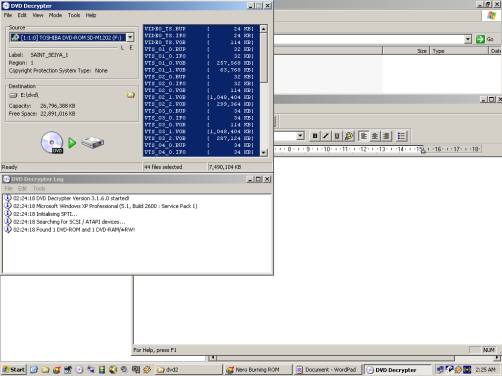
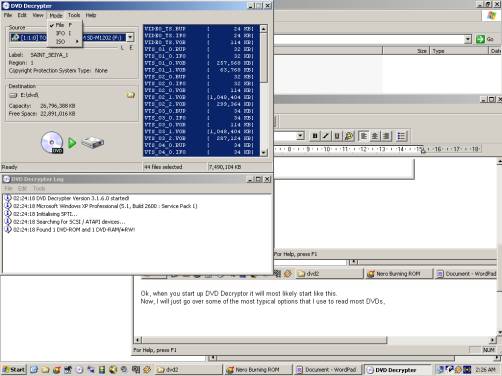
Ok, when
you start up DVD Decryptor it will most likely start like this picture
above. Now before we begin
ripping, I want to just go over
some of the most typical options that I use to read most DVDs, If you already have your Decryptor
already configured then skip to
section B.
A. Configuring DVD Decryptor
Look at the top bar, there is the word MODE. If you click this Under Mode there is a option
listed as FILE. I like to
have it decode and save the data as files, so make sure FILE is checked. Sometimes for ripping the entire
DVD for uploading and such or for games,
then ISO is the option to be checked, but that is for a later chapter.
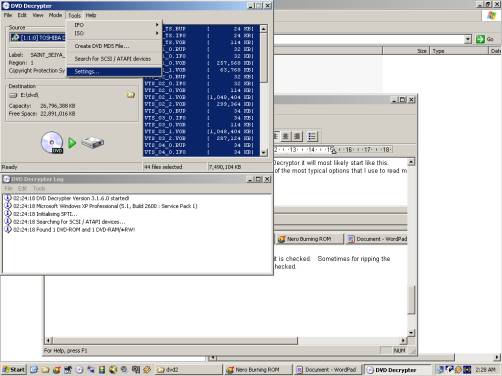
Now, again from the top
tool bar, there should be an option labeled TOOLS. Under Tools, there is the SETTINGS
option. Go and Click
SETTINGS and from that is this
sub-window pops up.
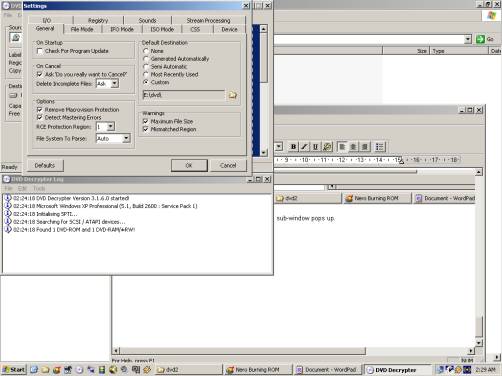
Generally, you don’t have to touch anything major, the program pretty much works straight out of the box (or zip file in this case). There is no point checking for Program Updates because there are none. The guy got busted and thus is no longer writing this program. Of course, make sure Remove Macrovision is checked because that is so important. If you got a flakey DVD you can uncheck Detect Mastering Errors, it might help. I also like to specify a custom directory for ALL the DVD rips to go. Otherwise, use Generated Automatically works pretty well too. With this option, it will just write it to a director which has enough hard drive space to fit the DVD in question. How much hard drive space you ask? You will need about 4.8 Gig for a single sided DVD and about 10 Gig for a dual sided and dual layer DVD.
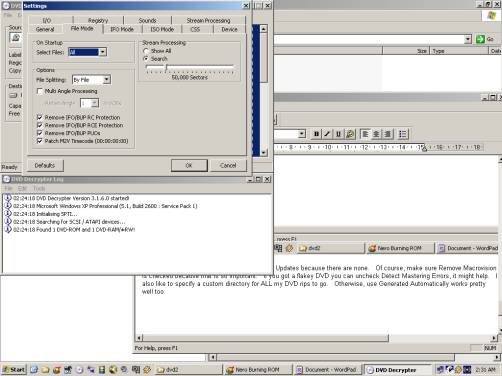
Under File Mode tab, you want to just make sure under ON START UP, that ALL the files are selected. This way when you stick in a DVD, DVD Decrytor will automatically select all the files so all you need to do is click RIP.
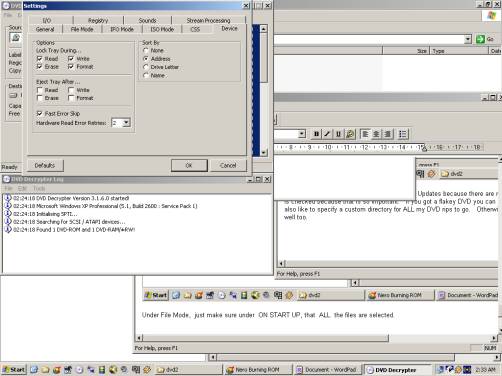
Under Device, you can check
Fast Error Skip and set the number of retries low to help you rip those DVDs
which are scratched and produce a lot of disk errors. It might help.
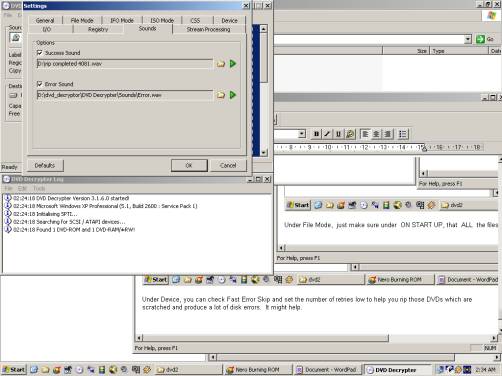
In Sounds, you can put your own custom *.wav files here to tell you when you are finished burning. In my systems, I built my own burning sounds, so I can figure out which computer(s) have finished doing the ripping.
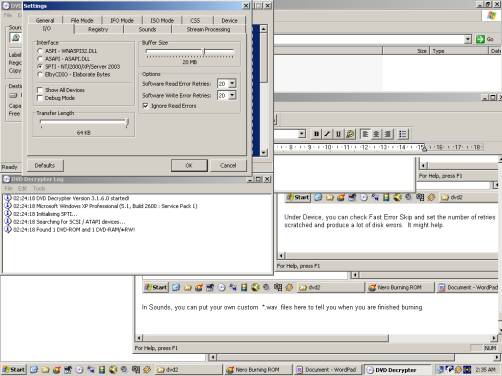
Under I/O, I check off “Ignore Read Errors” , so it will help me rip those scratchy DVDs. It sometimes helps, If you are worried about making perfect burns without glitches then you probably wan to leave this alone so it will detect those even slightly scratched disks. It will give you an indication of a bad rip.
B. LET HER RIP!
Anyway, back to the DVD ripping.
Well, with all these options set, all you have to do is stick in the DVD
you want to copy. It will
load up like this picture below.
This tells us that it has loaded up and figured out the format of the
DVD. Now press the
button (DVD to hard drive graphic on the left).

Ok, let it do it's thing.
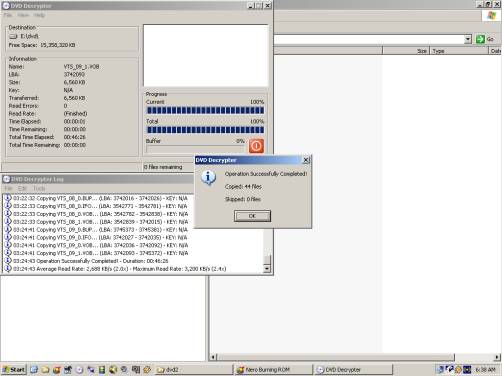
And then you are done. At this juncture you are ready to use the files that are now on the hard drive. Possible things you could do with the file are:
a) play them with your computer DVD player like PowerDVD
b) you can encode it to a different format like DIVX
c) you can burn it to a blank DVD-R. (covered in Chapter 2)
d) use it as video cips in a graphics editor like Adobe Premiere.
are: